どうも、Tです。
ストレージの検証環境を充実させるため、Isilon SD Edgeを作ることにしました。なんといっても商用でなければ無料で使い続けられるのが魅力的でした。
Isilonが何なのかとかは割愛します。
目次
構想
大体の構成図
コンポーネント
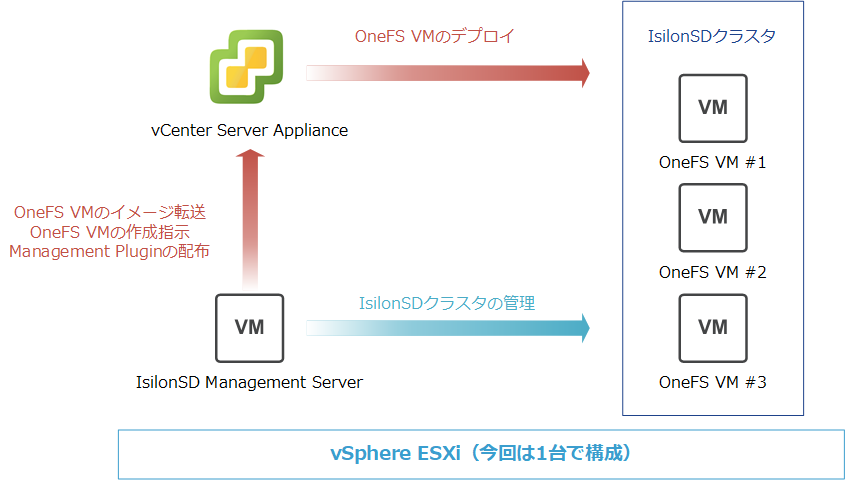
今回は、vSphere ESXi1台の上にすべてのコンポーネントを動かします。
Isilon SD Edgeの構成要素は、Management ServerとOneFSノードになります。OneFSのデプロイにvCenterは必須要素です。
ネットワーク
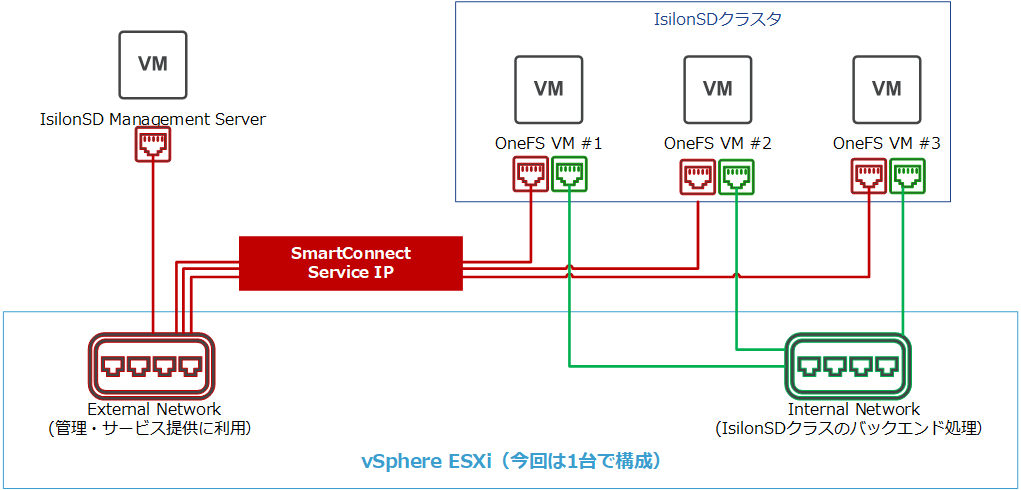
ネットワークは、ExternalNetworkとInternalNetworkが必要です。同じセグメントでも検証環境なら動きそうでしたが、ESXiで仮想スイッチを別で用意してセグメント分割しました。
ExternalNetworkは、OneFSノードでIPを持ちますが、SmartConnectServiceIP(クラスタの代表IP)を持ち、利用者はSmartConnectServiceIPに接続するようにします。
実施した環境
下記のバージョンを利用しました。
- vCSA:vCenter Appliance 6.7 Update 3a (6.7.0.41000)
- vSphere ESXi:VMware ESXi, 6.7.0, 14320388
- Isilon:EMC IsilonSD Edge OneFS 8.1.2.0
事前準備
Isilon SD Edgeのダウンロード
下記にアクセスしてIsilon SD Edgeのパッケージをダウンロードします。


右下のDownloadをクリックします。

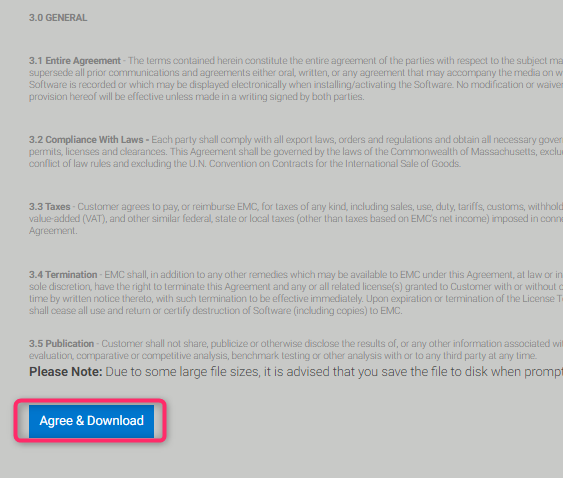
EVALUATION LICENSE AGREEMENTを読んで、「Agree & Download」をクリックします。
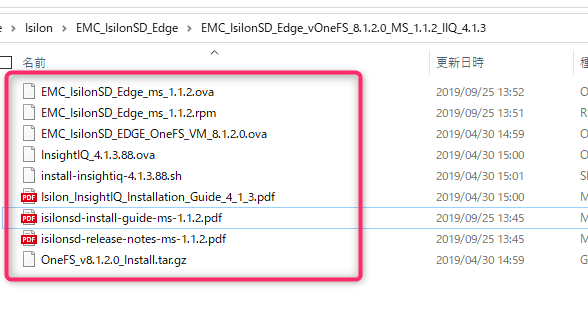
ZIPファイルを展開して、下記のようなファイルがあることを確認しておきます。
制約事項とか確認
インストールに関する方法や制約は、「isilonsd-install-guide-ms-1.1.2.pdf」に記載されています。
英語なので読めませんバージョンが少し古いですが、下記に日本語のほうで確認します。
Isilon SD Edgeのデプロイ方法
IsilonSD Management Serverのデプロイ
デプロイ
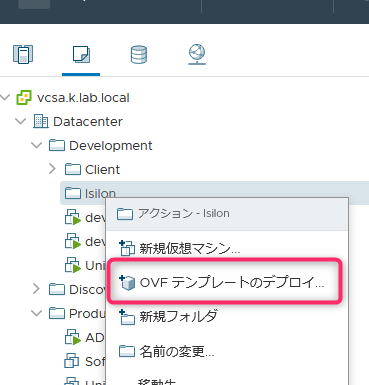
まず、IsilonSD Management ServerをvSphereにデプロイします。
vSphere Clientで「OVFテンプレートのデプロイ」をクリックします。
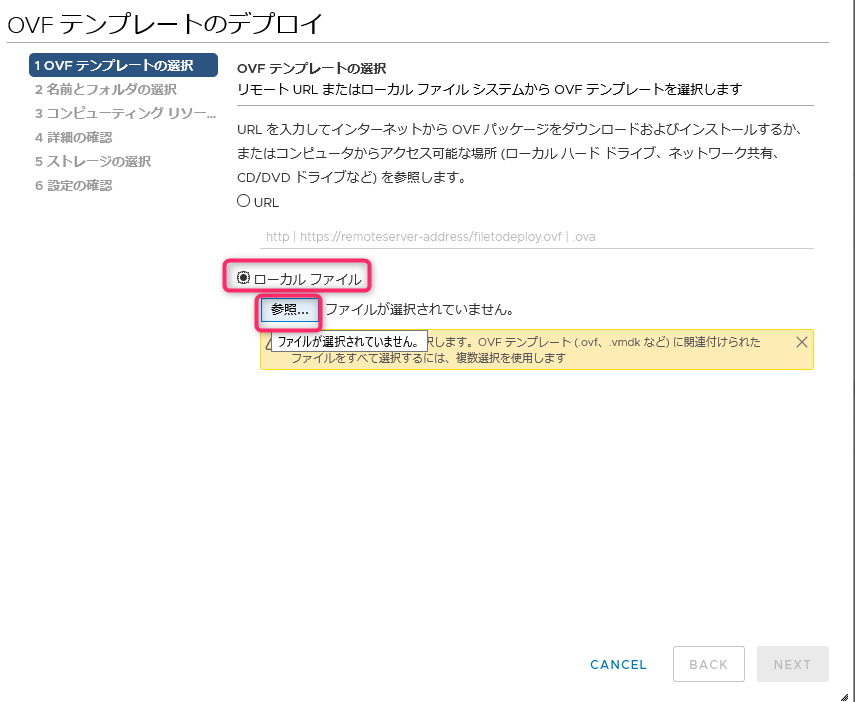
「ローカルファイル」->「参照」をクリックします。
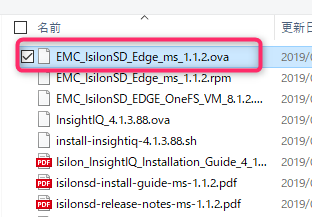
Management Serverである「EMC_IsilonSD_Edge_ms_1.1.2.ova」を選択します。
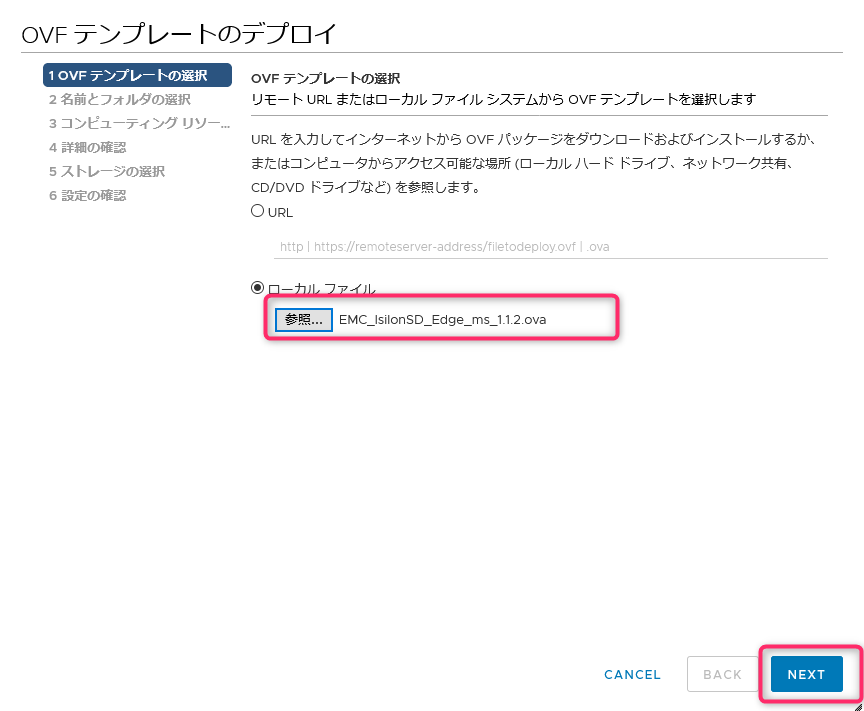
ファイルが選択されていることを確認し、「NEXT」をクリックします。
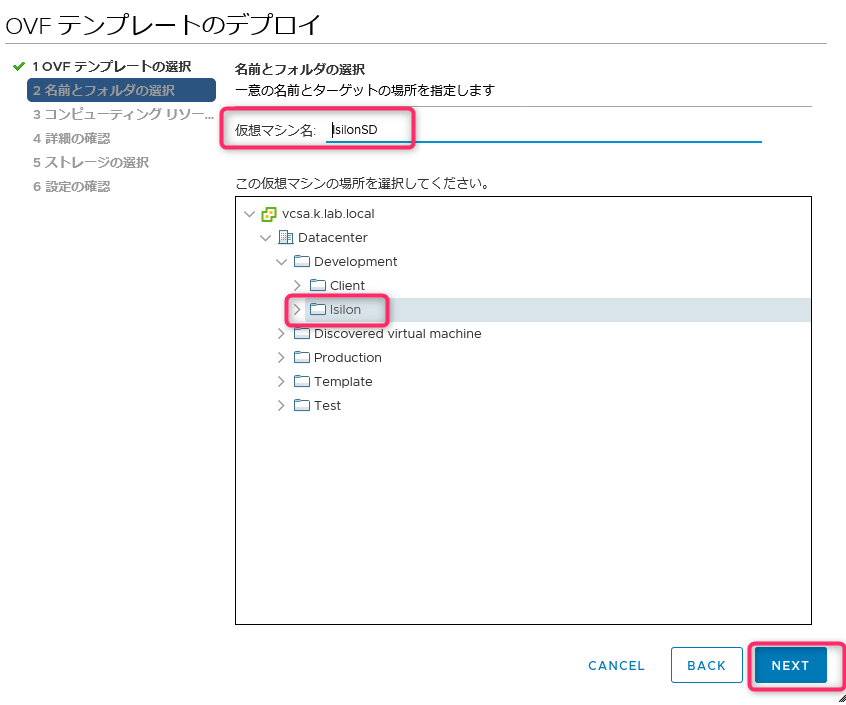
仮想マシン名と配置場所を選択して「NEXT」をクリックします。
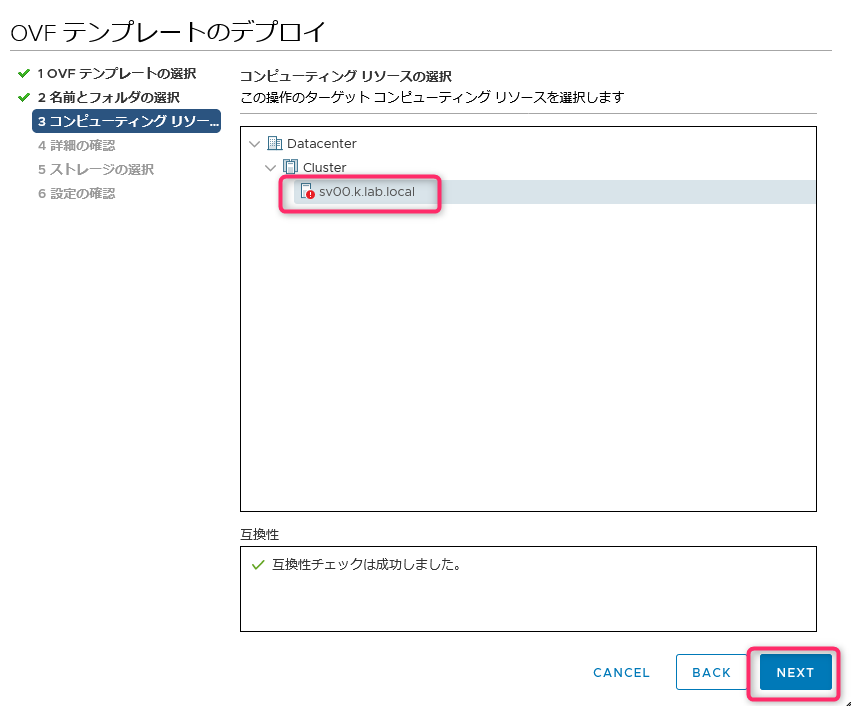
デプロイ先のESXiホストを選択して「NEXT」をクリックします。
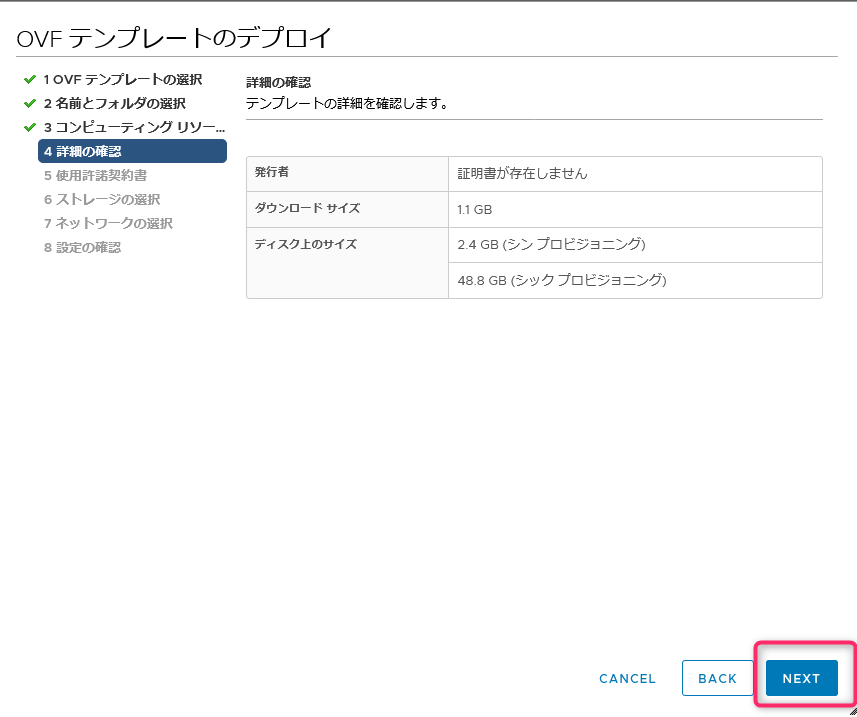
「NEXT」をクリックします。
「すべての使用許諾契約書に同意します。」にチェックを入れ「NEXT」をクリックします。

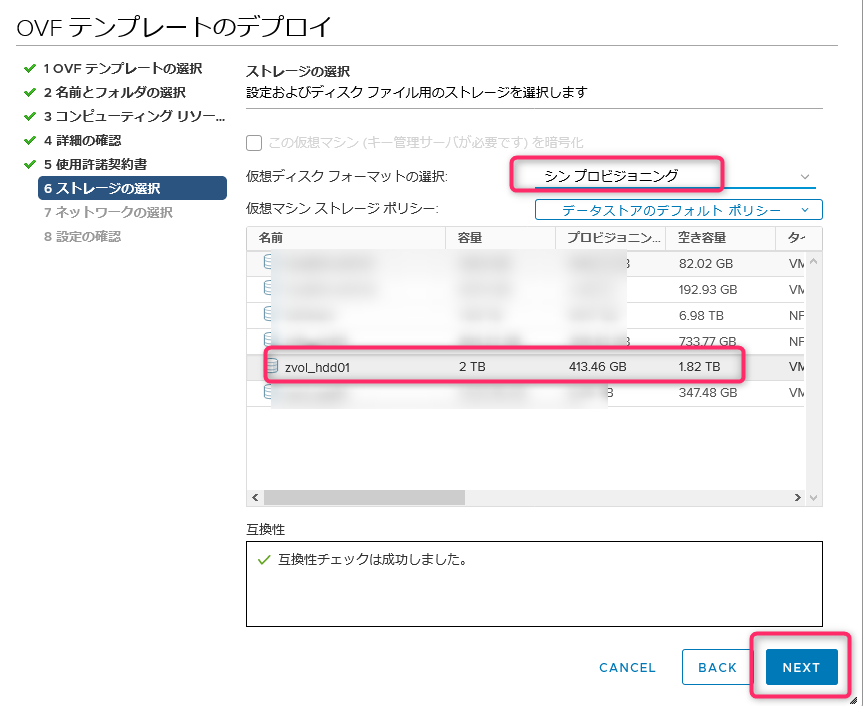
デプロイ先のデータストアを選択して、「NEXT」をクリックします。
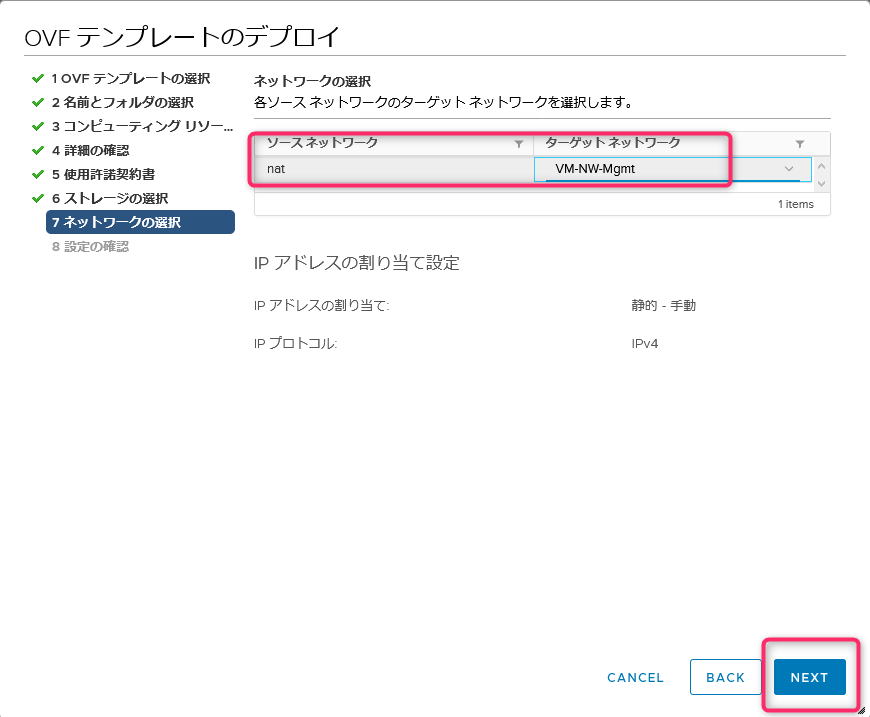
ターゲットネットワークで仮想スイッチを選択します。vCenterを通信可能なセグメントを選択してください。選択後、「NEXT」をクリックします。
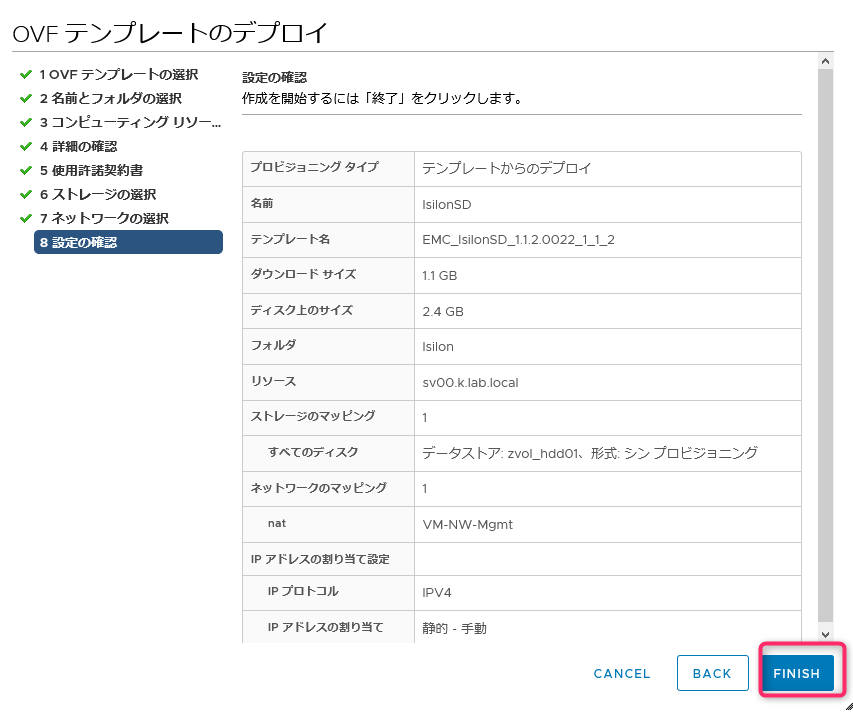
設定内容を確認し、「FINISH」をクリックします。
Management Serverのデプロイが開始されます。

完了しました。

初期設定
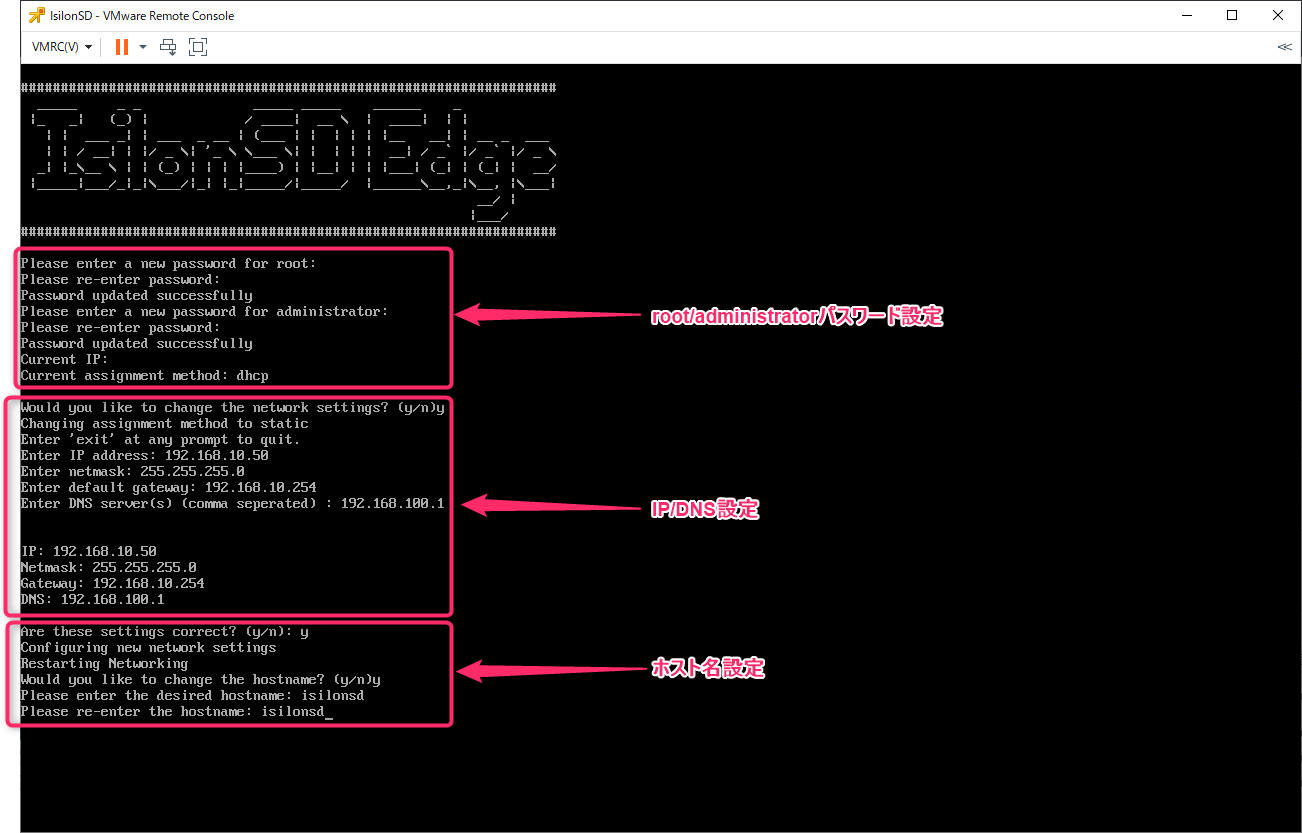
Managemenet Serverの下記の初期設定を行っていきます。
- root/administratorパスワード
- IP/DNS設定
- ホスト名設定
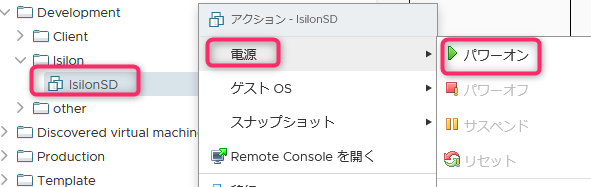
自動起動するような記事もありましたが、vSphere Clientからだとしなかったですね。手動でパワーオンします。
起動します。
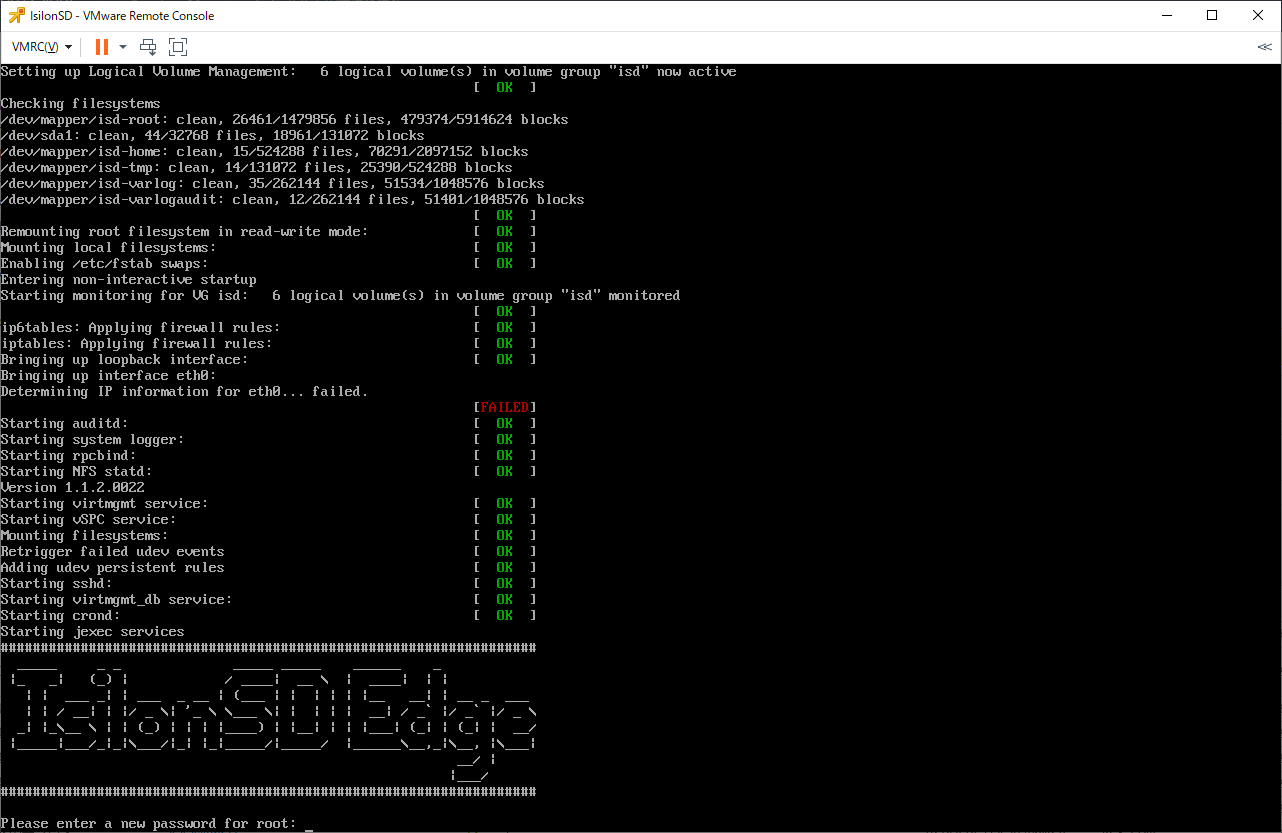
ウィザードが表示されるので、設定しましょう。
設定を行うとログイン画面になります。CentOS6.10が使われていました。
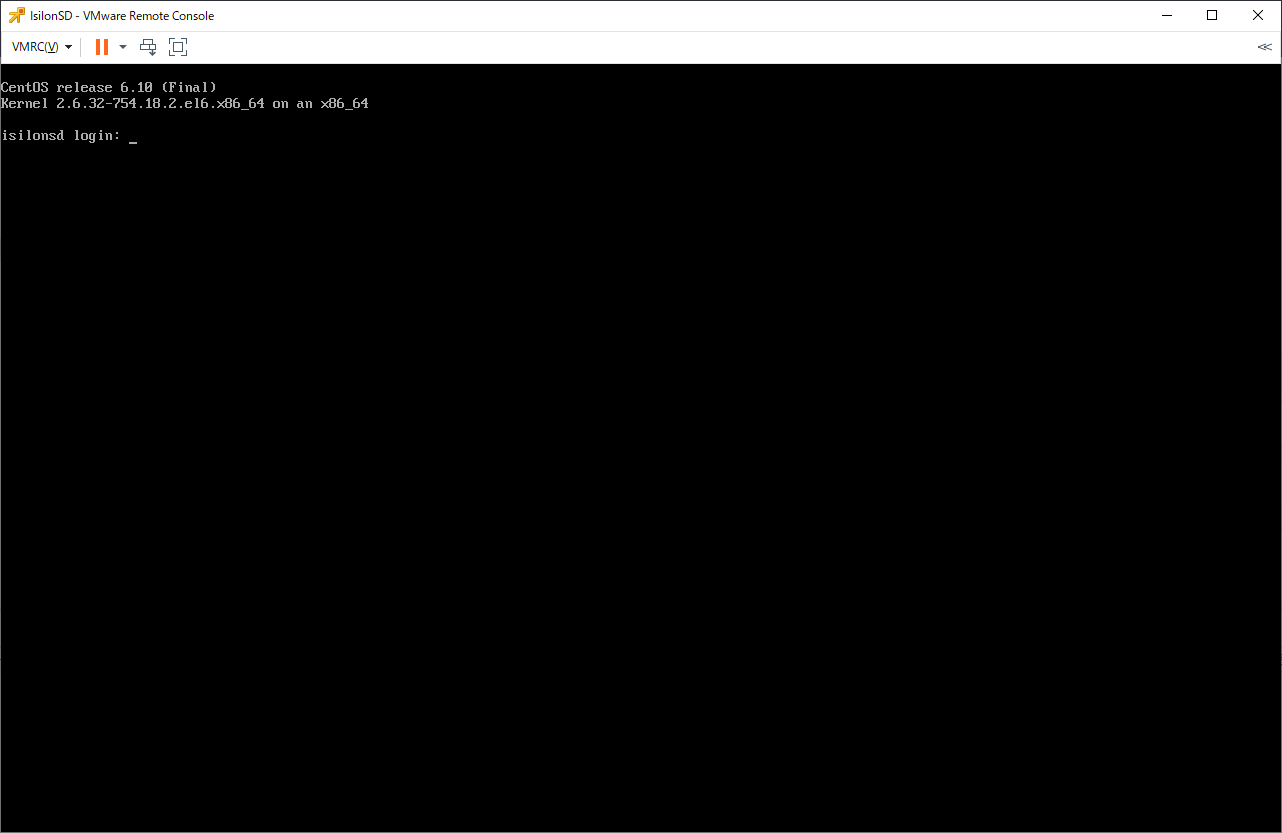
IsilonSDログイン
管理画面にアクセスできるか確認します。「https://<Management ServerのIPアドレス>:9443」にアクセスします。
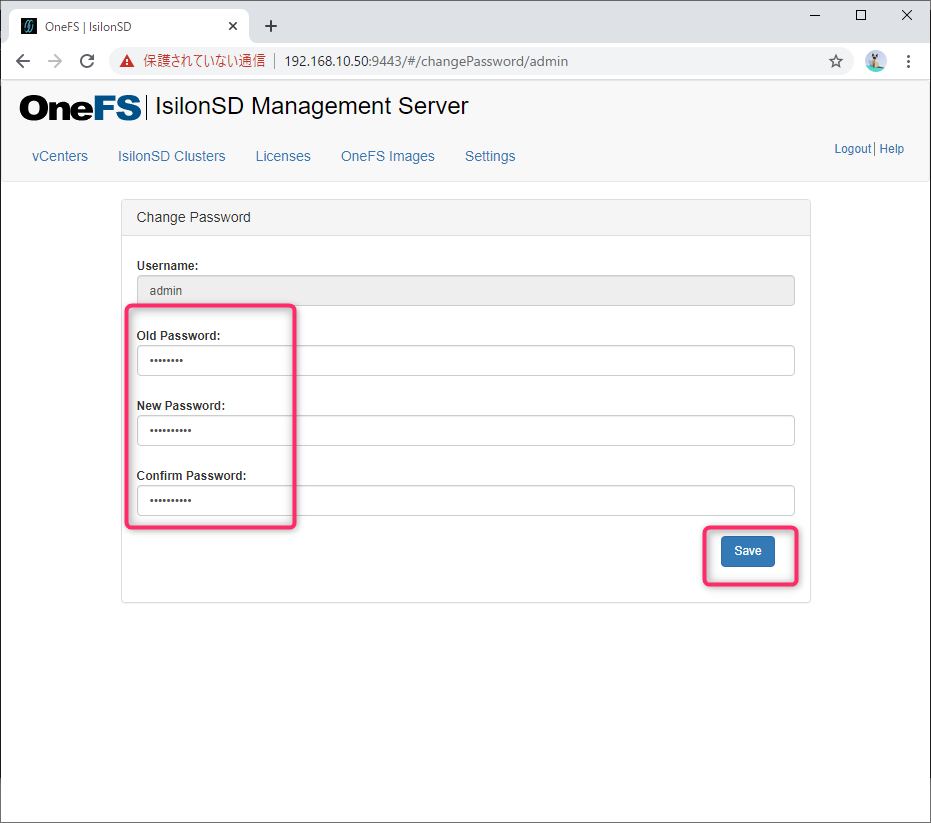
Username:admin Password:sunshineを入力し、「Login」をクリックします。※ここは先ほどのウィザードで設定したユーザー・パスワードとは関係ないです。

adminのパスワード変更画面ができるので、sunshineから任意のパスワードに変更します。
ライセンス確認
ログインできたら、「Licenses」タブをクリックしてライセンスを確認しておきます。×以外機能は使えるようになっています。
OneFS VMのデプロイ
OneFSデプロイをしていきます。設定はManagement Serverの管理画面から行います。
vCenter登録
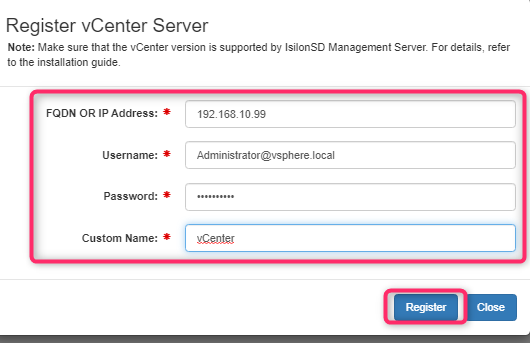
Management ServerにvCenterを登録します。
「vCenters」画面を開いて「+」をクリックします。
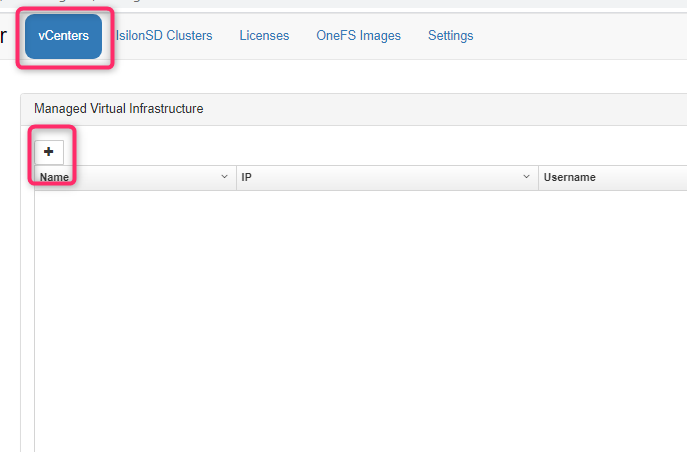
vCenterへの接続情報を入力します。Custome Nameは、Management Sserver上の表示名に使われるのでわかりやすいvCenter名を付けましょう。
入力したら「Register」をクリックします。
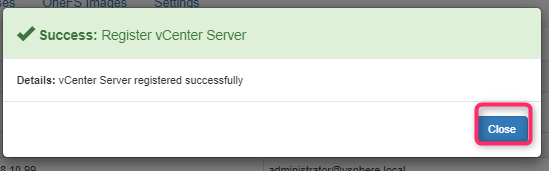
Successが表示されることを確認して、「Close」をクリックします。
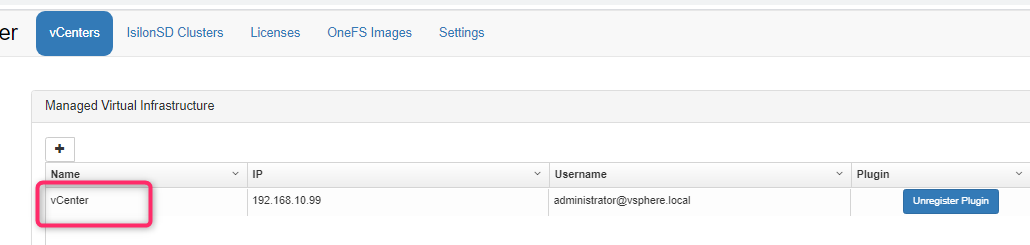
vCenterが登録されました。
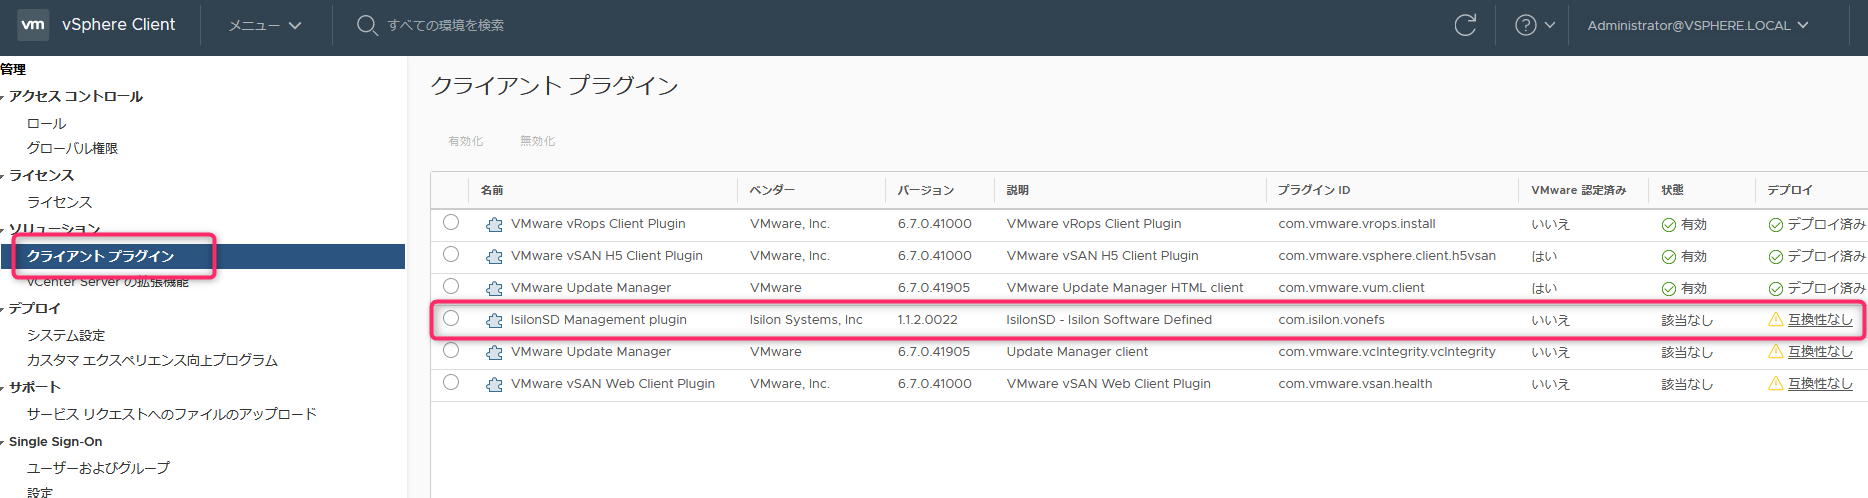
vSphere Clientの「管理」->「ソリューション」->「クライアントプラグイン」を見てみると「IsilonSD Management plugin」が登録されています。
OneFSイメージアップロード
デプロイするOneFSのイメージファイルをManagement Serverにアップロードします。このイメージがvCenterに渡されてVMデプロイが行われます。
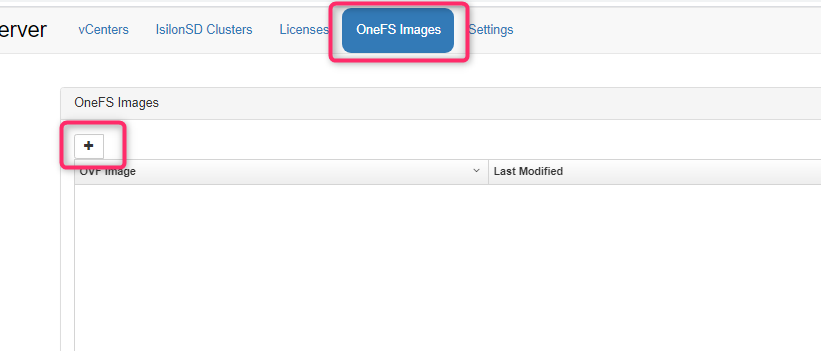
Manamgenet Server管理画面の「OneFS Images」画面を開いて「+」をクリックします。
「Browse」を選択して「Drop the ovf file here or click here to select the file」をクリックします。

ダウンロードしたファイルの中にある「EMC_IsilonSD_EDGE_OneFS_VM_8.1.2.0.ova」を選択します。
ファイルが選択されたことを確認して「Upload」をクリックします。
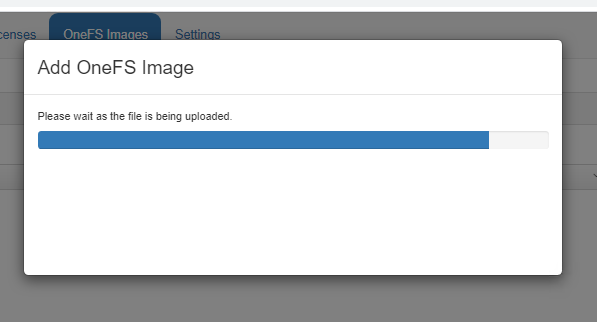
アップロードが開始されます。
Successになることを確認し、「Close」をクリックします。
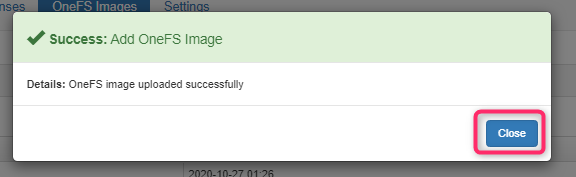
OneFSのイメージファイルが登録されました。

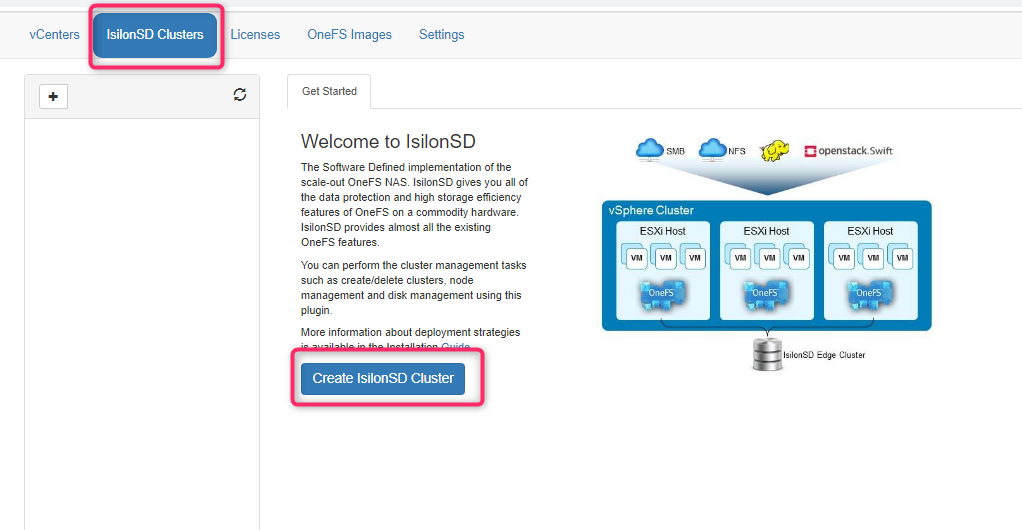
IsilonSD Cluster作成
OneFSをデプロイしてIsilonSDクラスタを作成していきます。
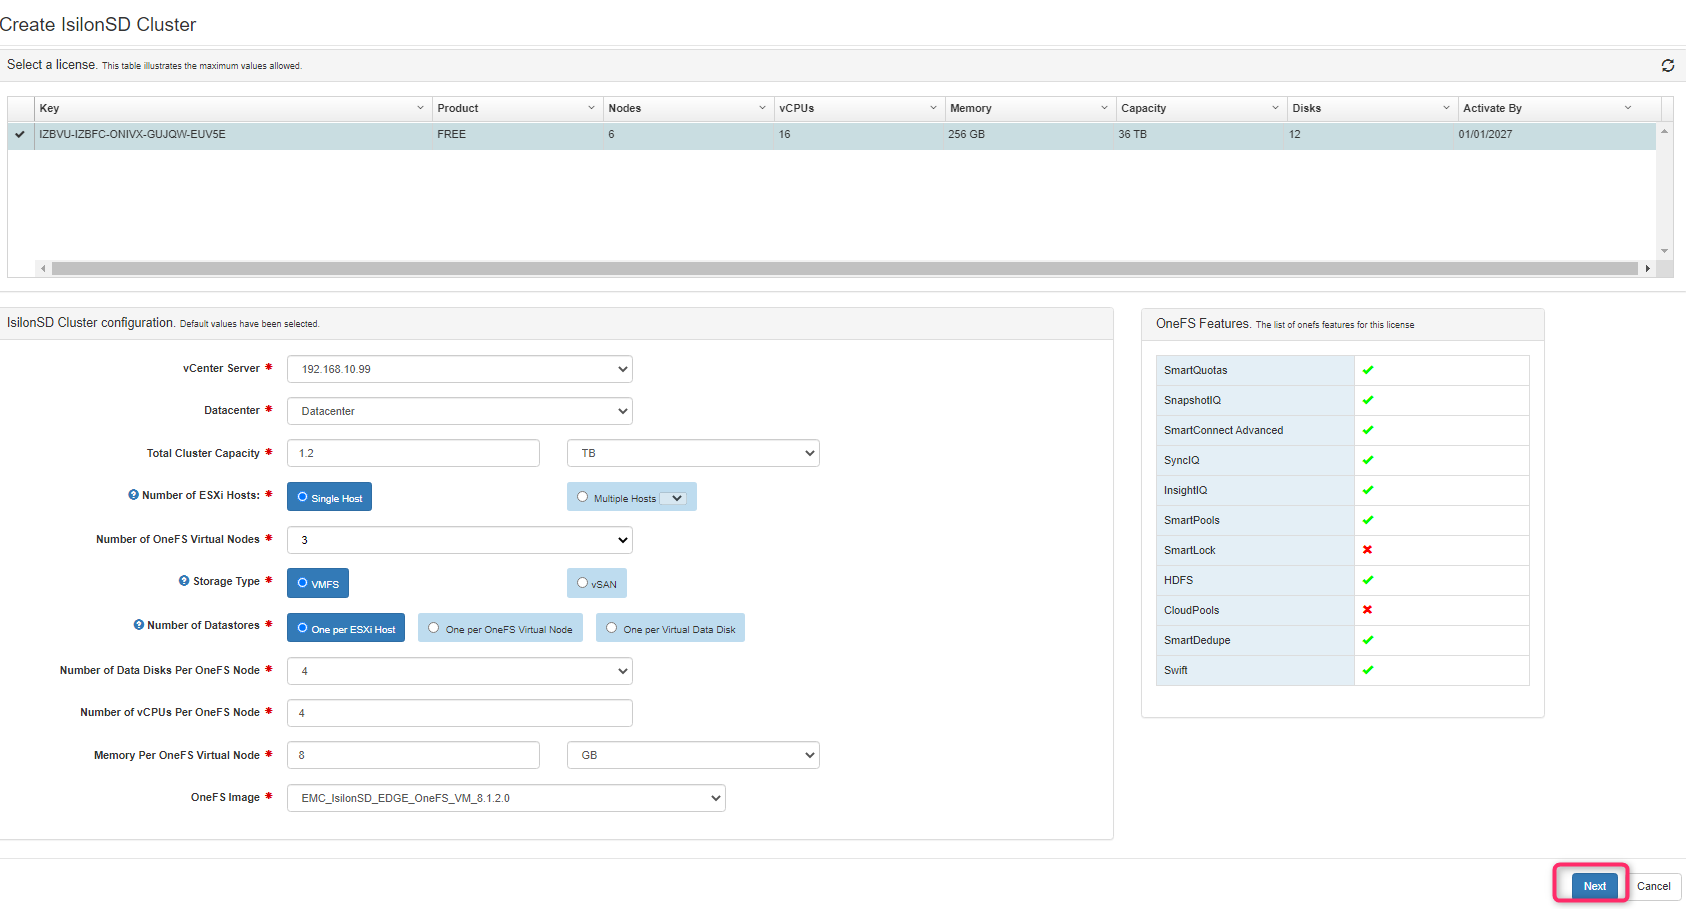
Management Serverの管理画面から実施します。「IsilonSD Clusters」画面を開き「Create IsilonSD Clsuter」をクリックします。
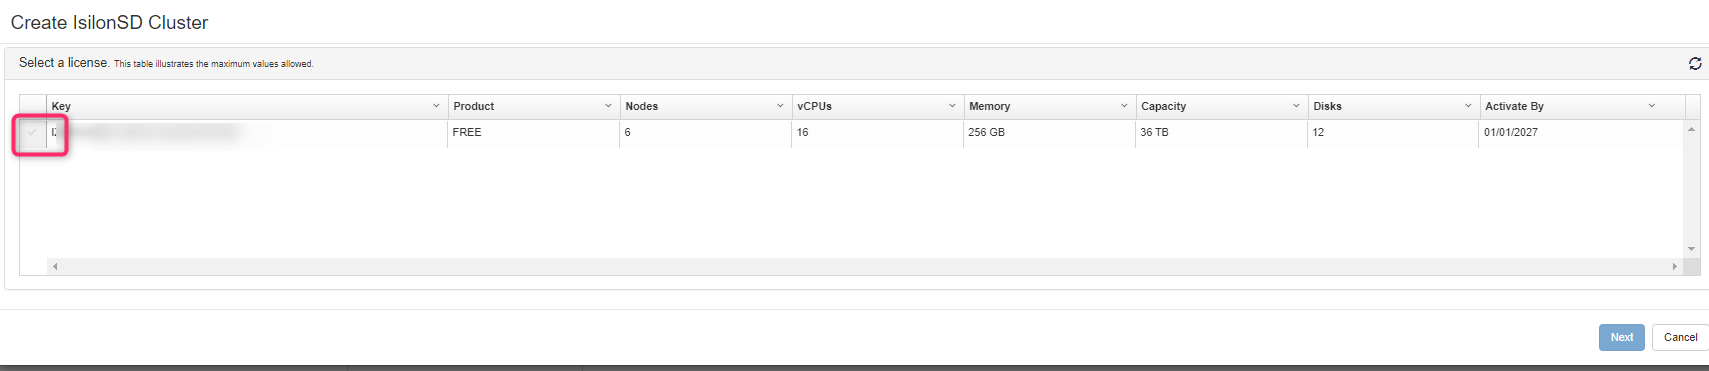
どのライセンスを使用するか選択します。わかりにくいのですが、ライセンス左横の「チェックマーク」がグレーアウトしているところをクリックします。
ライセンスをチェックすると画面左下にClusterに関する設定項目「IsilonSD Cluster configuration」が表示されます。
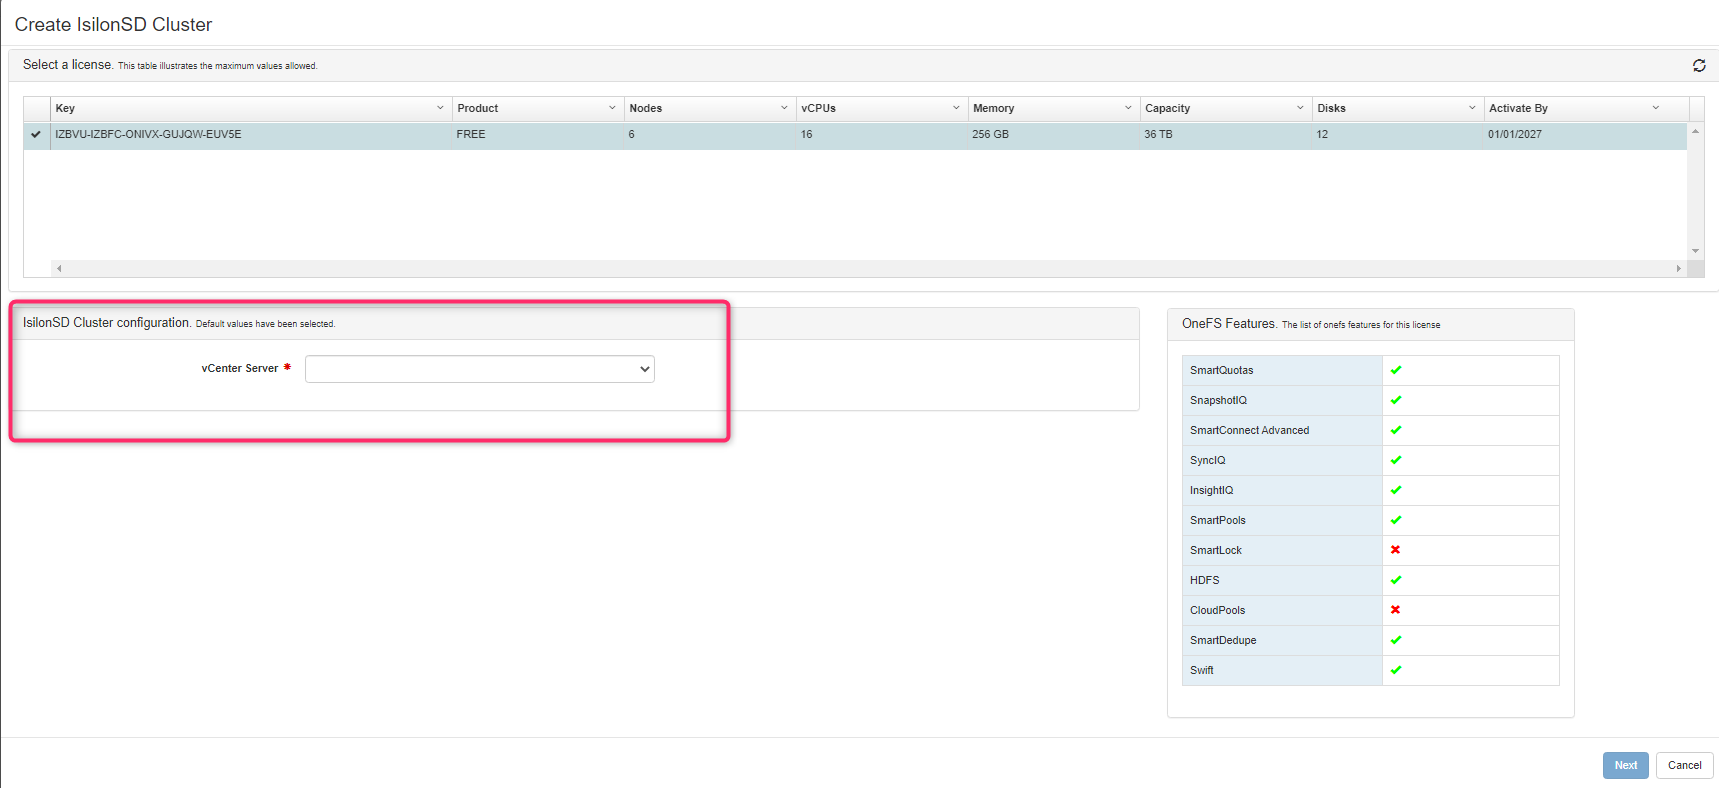
今回は、下記のように設定しました。
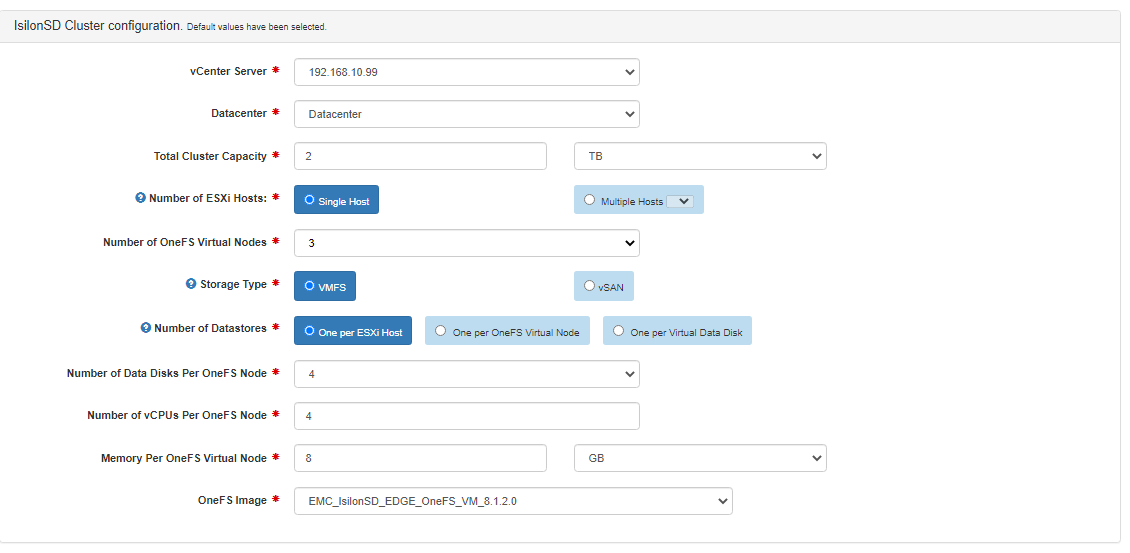
ここの設定項目の内容が最初よくわからなかたので、記載しておきます。
vCenter Server
デプロイを行うvCenterを選択します。
Datacenter
デプロイするデータセンター名を選択します。
Total Cluster Capacity
IsilonSDクラスタで用意するHDDのサイズです。実行容量ではなく、指定したキャパシティをノード数で割った容量がvmdkに割りあたるようです。
今回3ノードで1.2TBを指定しているので1ノードあたり400GBのvmdkが作成されます。
Number of ESXi Hosts
デプロイするESXiホスト台数の指定です。今回1台で行うのでSingle Hostを選択しています。
Number of OneFS Virtual Nodes
OneFS(ノード)を何ノードデプロイするかの指定です。3~6台になります。
Storage Type
OneFSノードが展開されるストレージが、VMFSかvSANかの選択です。
Number of Datastores
いくつのvSphereのデータセンターを利用するかの指定です。今回はシンプルにOne Per ESXi Hostを選択しています。
One per ESXi Host:1台のESXiホストにつき1つ
One per OneFS Virtual Node:1台のOneFSノードにつき1つ
One per Virtual Data Disk:1つのVMDKファイルにつき1つ
Number of Data Disks Per OneFS Node
1ノードあたり、いくつのVMDKを使うかの指定です。4、8、16から選択です。
Number of vCPUs Per OneFS Node
1ノードあたり、いくつのvCPUを使うかです。未確認ですが、ノード数×vCPU < ESXiが持つコア数でなければならないようです。
今回使っていたのは、物理コア12/論理コア24のサーバーだったので、3ノード×vCPU4=12と考えると、論理コア以下であれば問題なさそうです。
Memory Per OneFS Virtual Node
1ノードあたり、いくつのメモリーを割り当てるかです。
OneFS Image
ノードのデプロイに利用するOneFSイメージの指定です。
設定が終わったら「NEXT」をクリックします。
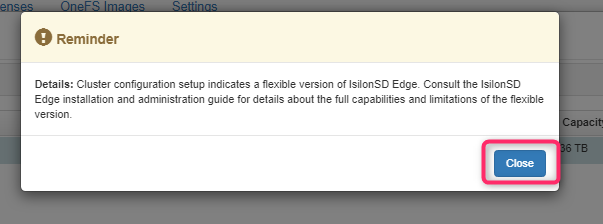
細かい仕様はマニュアル見ろよ的なことが書いてあるので、読んだ後「Close」をクリックします。
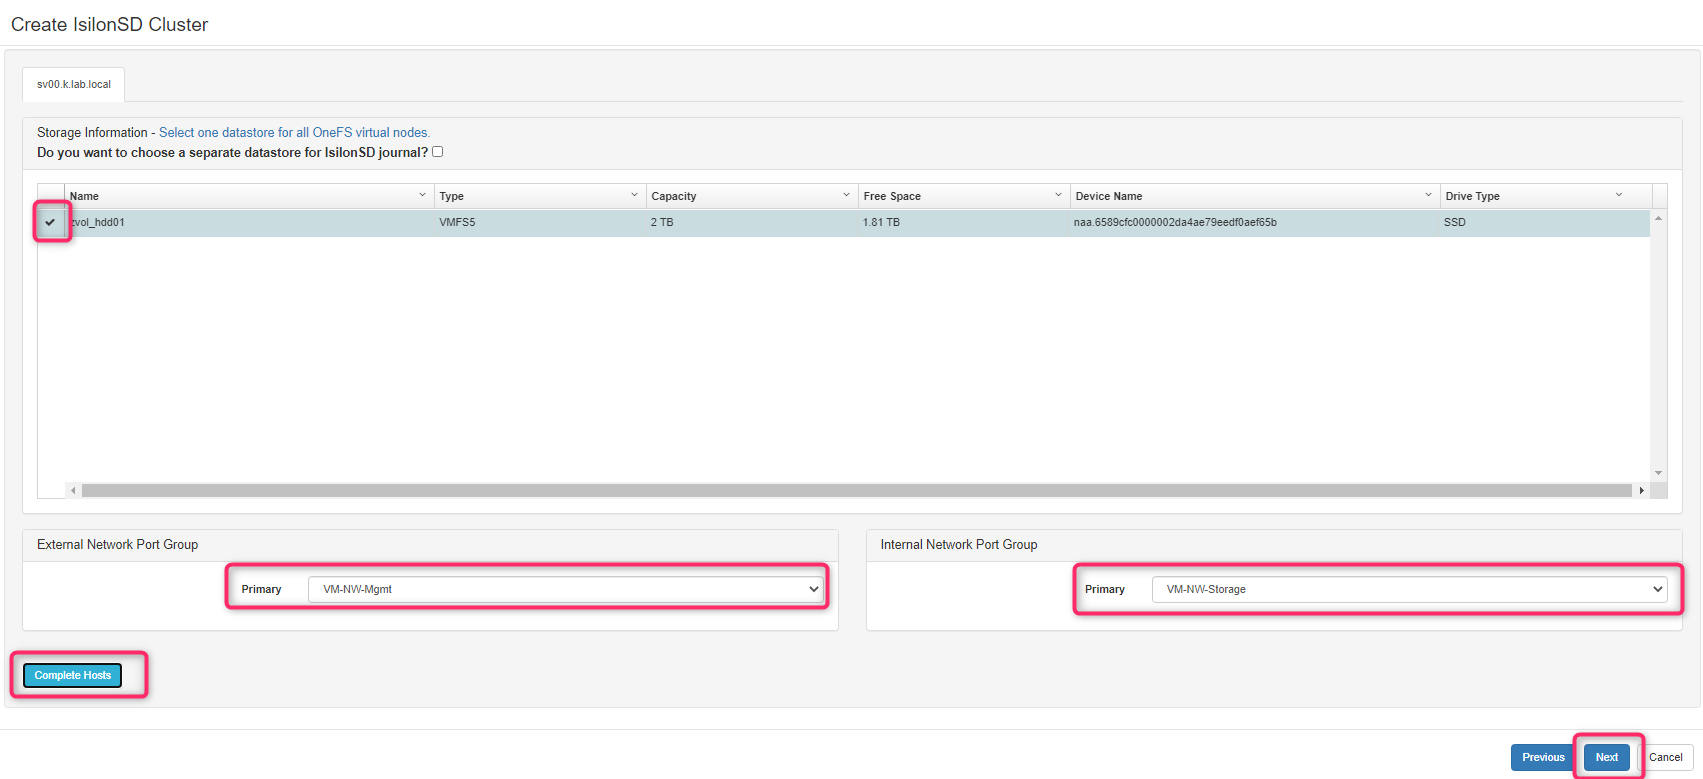
デプロイするESXiホストを選択して、「Next」をクリックします。

デプロイするデータストアを選択します。複数データストアがあったのですが、「Total Cluster Capacity」で指定した以上の空き容量があるデータストアしか表示されないようです。
External NetwlrkとInternal NetworkにそれぞれPort Groupを選択し、「Complete Hosts」をクリックした後、「NEXT」をクリックします。
それぞれの値を入力して「NEXT」をクリックします。
なお。ここのrootとadminは、OneFS(IsilonSD Cluster)で使われるユーザーになります。
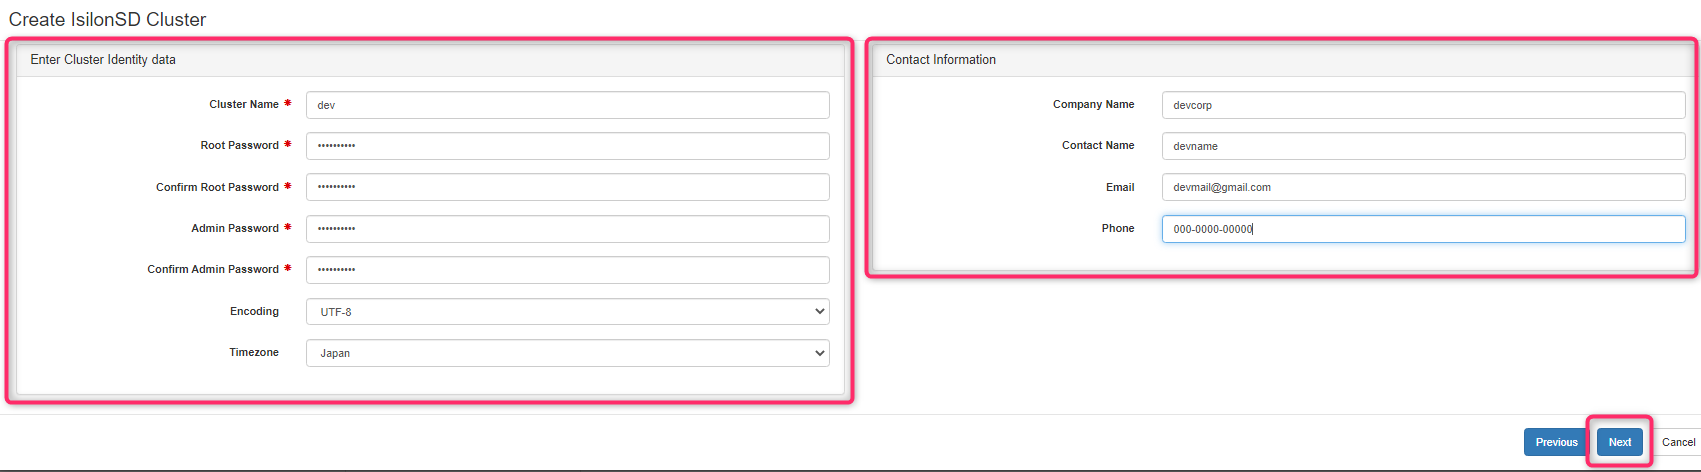
ネットワークの設定を入力して「Next」をクリックします。DNSはコンマで複数指定可能です。
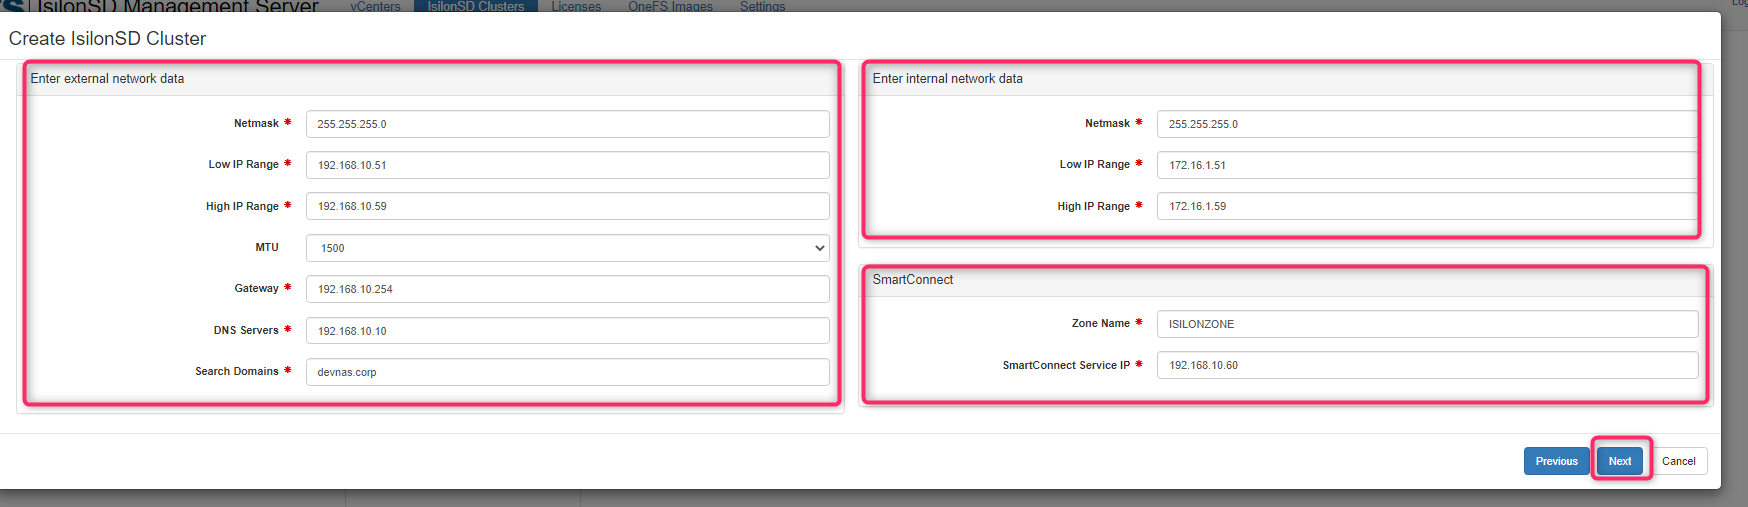
ここもよくわからなかったので備忘録です。
external network data
Low IP Range:ノードに割り当てる開始IPです。
High IP Range:ノードに割り当てる終了IPです。3ノードなので3つでいいのですが、この後の検証のため多めに割り当てています。
DNS:IsilonSD Clusterが利用するDNSの指定です。検証環境の関係で、vCenterとManagement Serverとは別のDNSを指定しましたが、大丈夫でした。
internal network data
Low IP Range:ノードに割り当てる開始IPです。
High IP Range:ノードに割り当てる終了IPです。3ノードなので3つでいいのですが、この後の検証のため多めに割り当てています。
SmartConnect
Zone Name:SmartConnectが管理するIPの範囲をZoneで管理しているようで、その名前です。任意の名前を付けます。
SmartConnect Service IP:external networkのIsilonの代表IPです。external networkと同じセグメントのIPアドレスを設定しましょう。
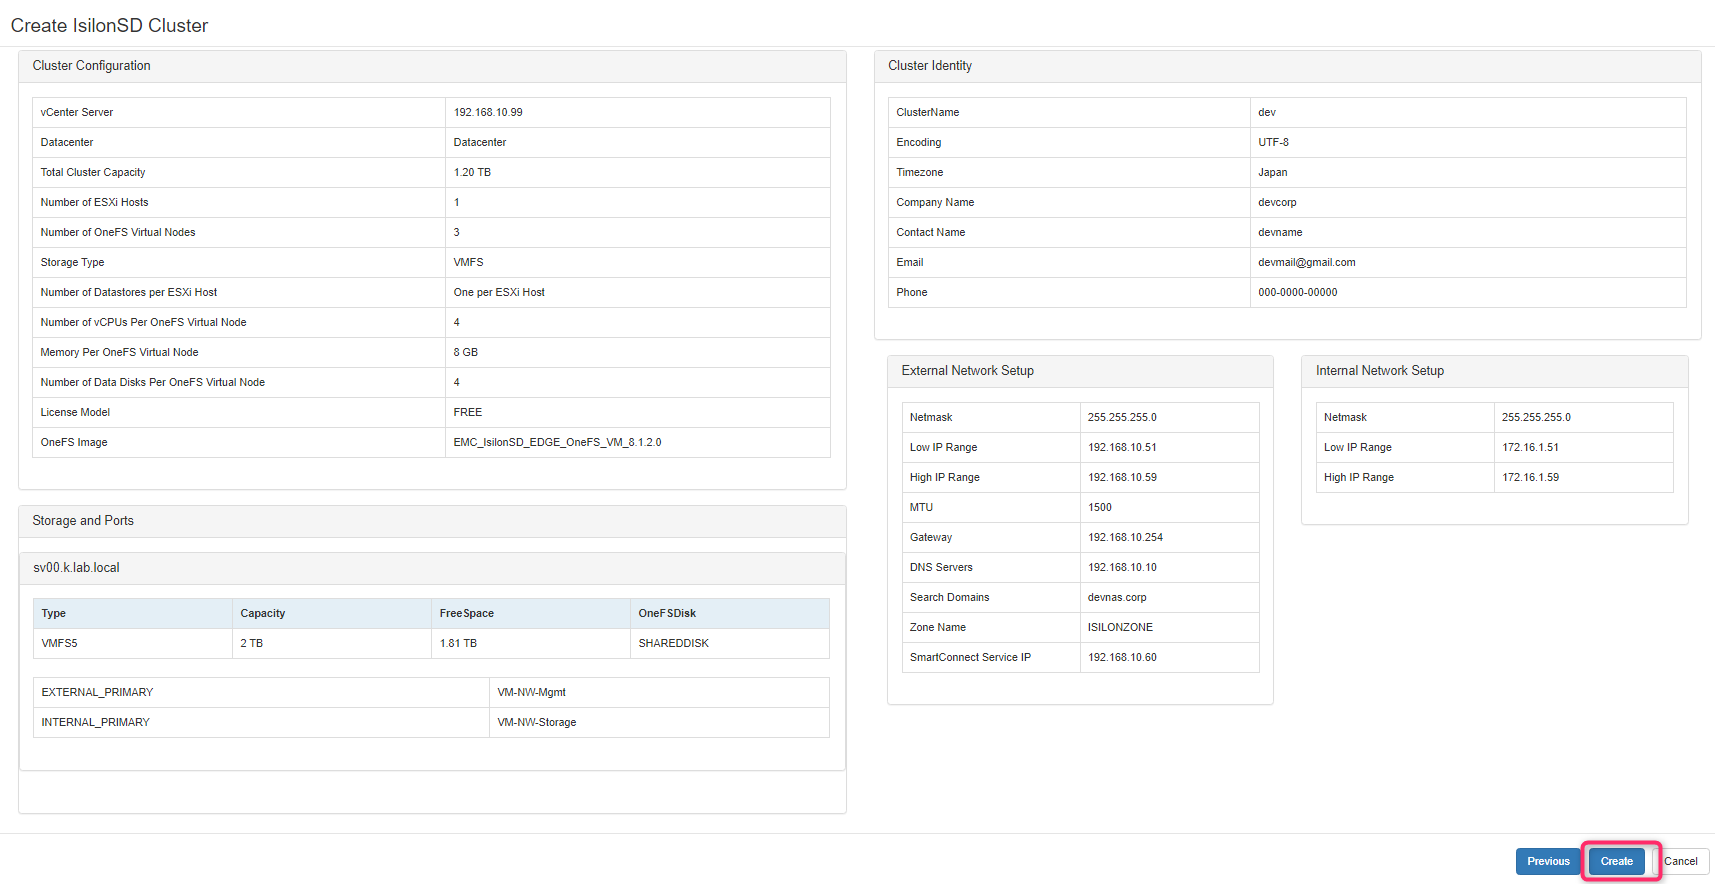
設定内容を確認し、「Create」をクリックします。
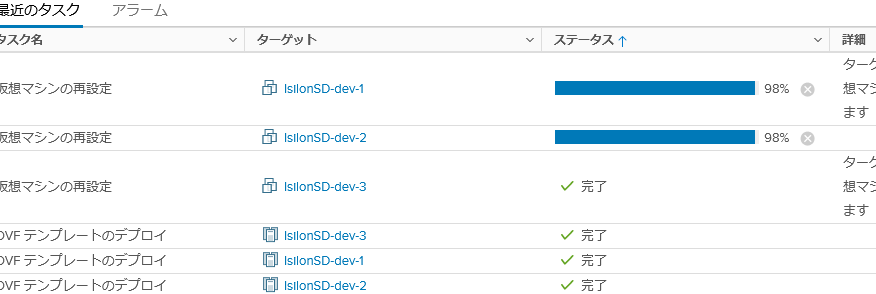
デプロイが開始されます。「Processing・・・」の表記にわかります。

vSphere Clientを確認するとデプロイ処理が開始されています。
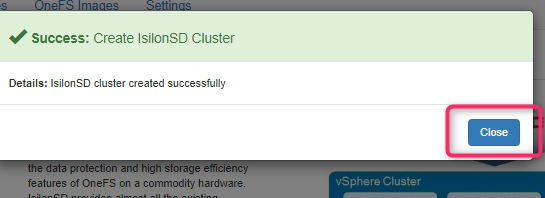
Successになることを完了し「Close」をクリックします。
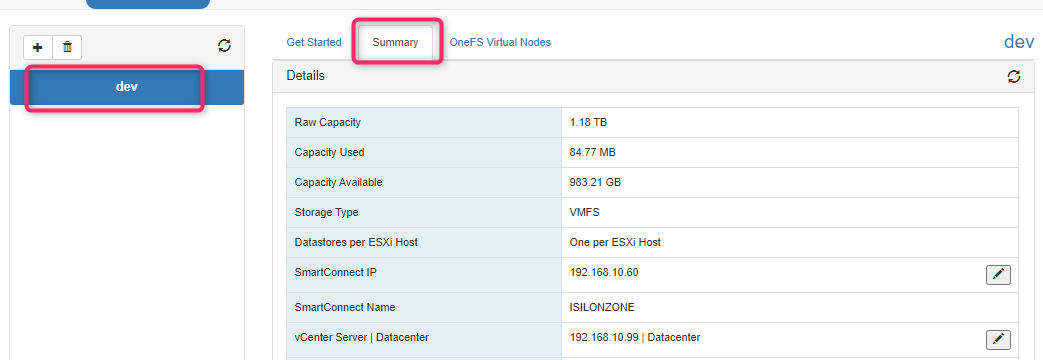
「IsilonSD Clusters」画面のSummaryを見るとClusterの状態などが確認できます。
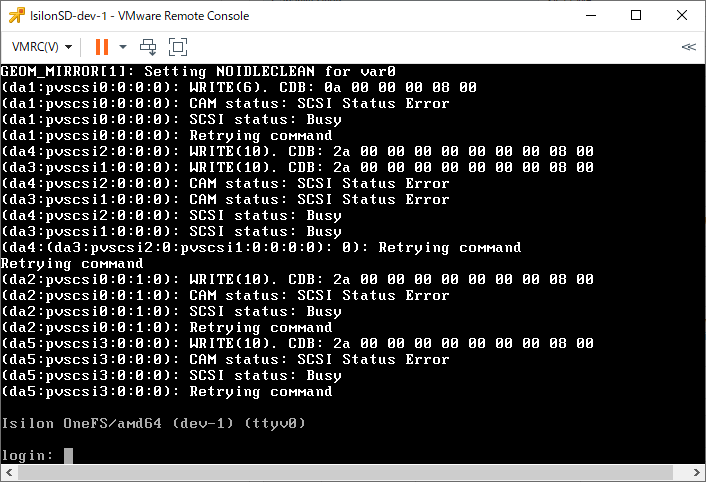
OneFSノードの仮想マシンを見ると起動しているのがわかります。
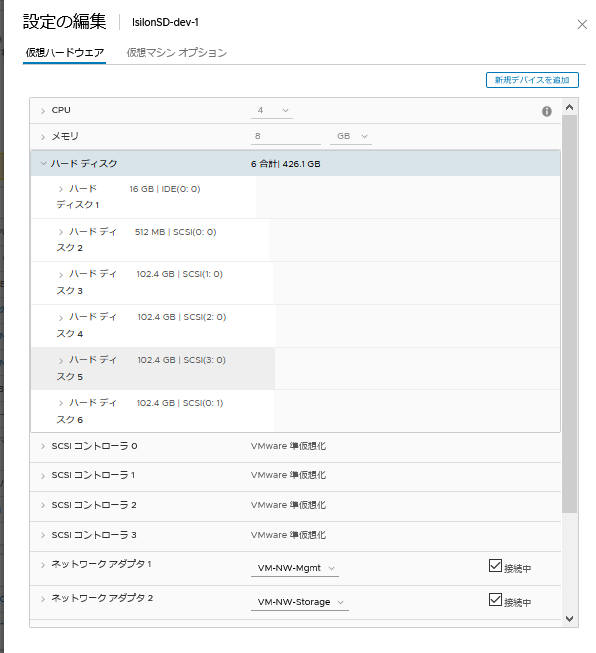
仮想マシンのハードウェア設定は、下記のようになっていました。ディスクも1ノードあたり400GB割り当てられています。
IsilonSD Cluster接続
作成したIsilonSD Clsuterに接続します。
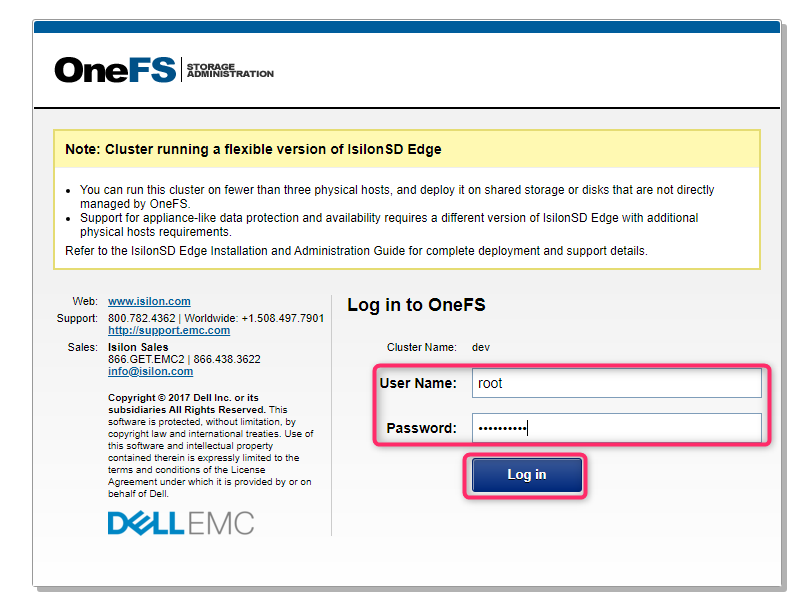
https://:<Smart Connect Service IP>8080/ にWebブラウザで接続します。

管理画面が表示されます。Cluster作成時に設定したrootもしくはadminの認証情報を入力して、「Log in」をクリックします。
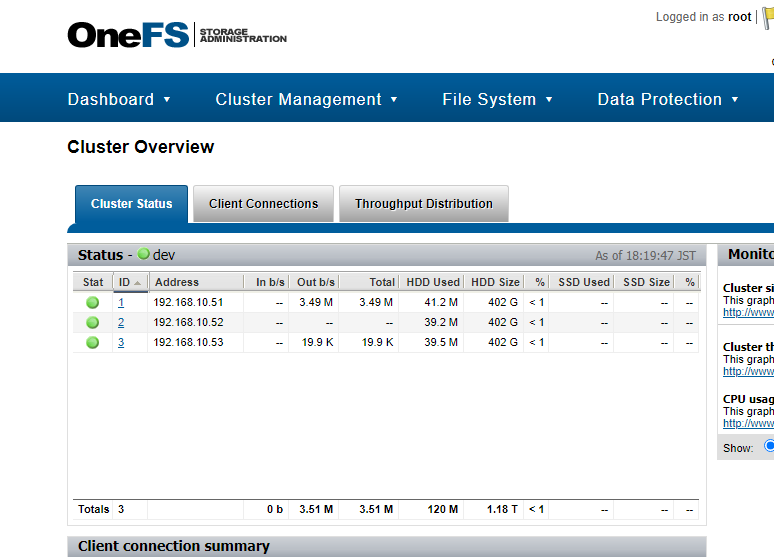
Clsuterの管理画面です。ここからストレージの設定などを行えるようになります。
参考


まとめ
んー、知らないと作るのも大変だなぁ。